Thursday 30 January 2014

DIY #3 - CHANEL SS14 BACK PACK

During Paris Fashion Week, Chanel's fashion show was turned into an art gallery bursting with colors, art statues like a giant Chanel N5 bottle robot, giant Chanel logo covered with pearls, quilted statue and many more astonishing sculptures, this reminds me of the artist Jeff Koons. 

    As model CARA D struts down the runway of Chanel SS14 show at Grand Palais , the back pack instantly caught my attention. From that moment onwards, I knew that I had to DIY it. 
The backpack, hand painted with the iconic CC logo and covered in million of tassels and chains, definitely the ideal bag for an art student. This is what happens when FASHION meets ART CHANEL ART ATTACK & Karl Lagerfeld knows best ! 

Model Cara Delevingne
Chanel SS14 Runway @ Grand Palais


Let's begin shall we ? :)

First, it's very helpful if you layout and organize all the tools and materials needed, because during the diy process, everything will be in a (ART)mess. Some of the tools and chains were recycled items and some I got it from a local craft store ( MAY HIN Craft store ) from Sungai Wang, Bukit Bintang.

This DIY is entirely up to your own creativity, you don't necessary have to copy mine. Just let your imagination & creativity take over !

Connecting wires, chains, clips, carabiner

Spray paints ! I used Black, Gold, Grey, Orange and White.

Some threads, giant chains, rope ( approx. 1 metre ) 
I got this leather back pack from Sg. Wang as well. It was retailed at RM 69.90 but the store owner told me it's not for sale due to the poor condition of the bag, it had stains on the bag & was a little dusty. but after a couple of bargains, I managed to get it for RM 15 (USD $5)


Start off by removing the extra leather pieces on the bag.


I sprayed a thin coast of white paint on top to cover the stains.
I printed out some Chanel logo in various sizes from Google search.


Arrange the layout of your design before spraying it.
This is the final design I came out with. Then, I used PVA glue mixed with a little water to paste the wordings and logos down. Ensure all surface of the paper are fully sealed to the bag.

This is the tricky part, just go with the flow. There is no mistake when you're making ART. Just don't overdo it.


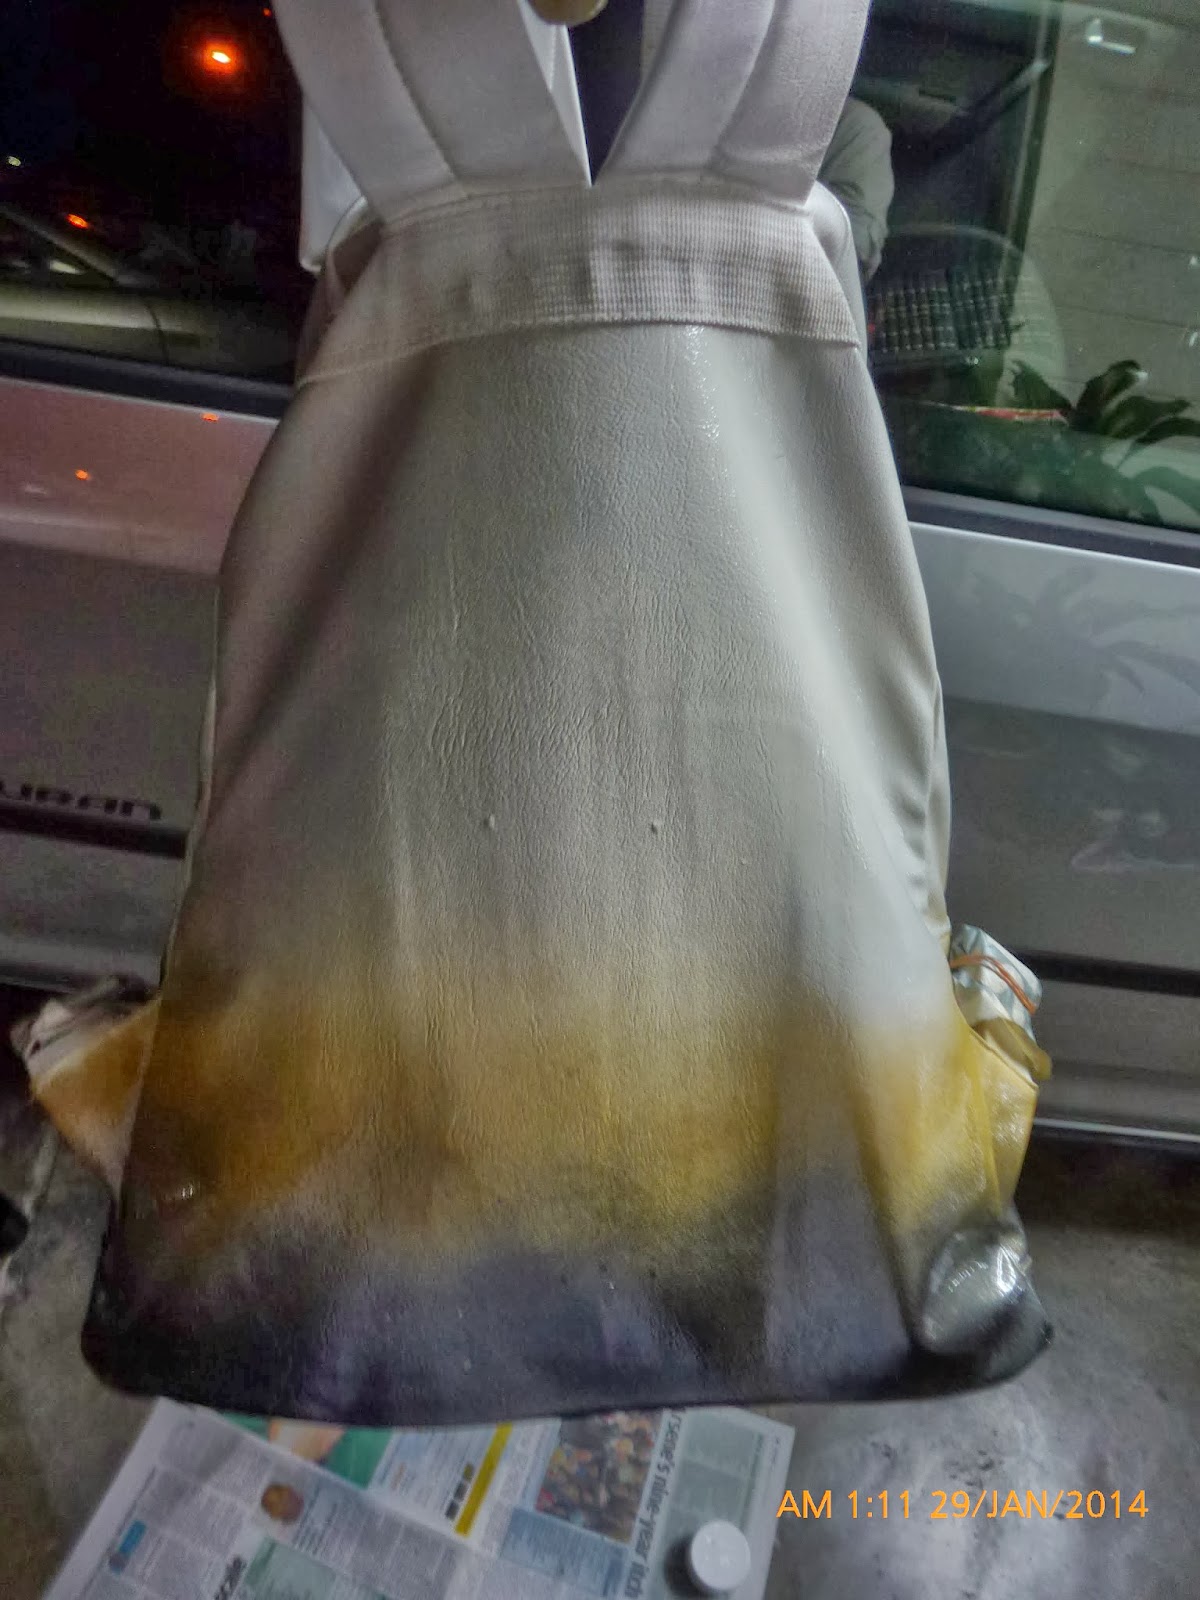
I mixed both orange and white paint to coat the leather lining of the bag as shown as the picture below. I felt like a craftsman for a while. lol 


Carefully remove the paper to reveal the final look.
A close up of the Chanel wordings. Do some touch up if you need to !


Basically, the bag is almost complete. What's lacking are the tassels and chains, I'll show you how I make this them below : 


I weave a white cloth into the gold chain, like those Chanel bag handles. Then add some more ropes and cloth, twist and tie, adding some accessories and VOA-LA ! 

 You can also make some CC logo charms like how I did. Just cut out a couple of the logo on a black card and glued them together using UHU glue.

Make a hole and hook in the chains. That's it 

 Hook the lanyard over and you're done. Feel free to hang it to different position, experiment and you'll know.

THE FINISHED PRODUCT

The back

The side


You're done, leave me a comment if you have any questions :) View my look on lookbook.nu with my Chanel backpack & give me a HYPE ! 


UPDATE

What I did was I added some extra twist of black & red wire to it, just to tighten everything together and also to give it a finish look.


Photo by : Me 
Photo courtesy of Chanel, no copyright intended. 

Monday 6 January 2014

NEW CÉLINE TOTES FOR S/S 2014

Celine has always been one of my favorite brands, I adore its simplicity and gender-free looking bag that is suitable for everyone to use, it does'nt matter whether its a casual or formal wearing, Celine bags always matches the outfit that you wear. the timeless and iconic bag such as the Luggage and Phantom bag are one of the house's signature bag.
     Ever since it was introduced, many other design came in as the year goes by such as : the Trapeze, Tie bag and many more. As for the Spring Summer 2014 collection. Celine once again launch a new designs of totes and bags which I find it uniquely interesting and eye catching at first sight,I can't resist but to blog about it.Introducing the new totes to the Celine bag family : Twisted, Cabas and Eyelet handbag.


TWISTED HANDBAG 


 I honestly can't wait to try this out at the boutique, it looks like a bag I would go out on a casual outing. The knot at the end of the handle is similar to the Tie bag, which is part of the house's signature. 

 CABAS PHANTOM HANDBAG


This, I have to admit is definitely my favorite and a must-have. It looks like a casual version of the Phantom bag fused together with Hermes's birkin/kelly design. I love how the strap at the sides hang outwards, it also can be use to tighten the bag with a ribbon knot I guess ? This definitely calls for a DIY project ! 


EYELET HANDBAG


 As mentioned by Bagaholicboy, It does looked like a washing machine to me, currently not my favorite piece form the collection but it might grow in me, so we'll see.

Visit celine.com for more photos ! Share with me your thoughts on the new design by commenting below.


Photo courtesy of Céline

Sunday 5 January 2014

DIY #2 - CÉLINE BERLINGOT BAG


As some of you might know that Celine is one of my favorite brands, when i first saw the clutch on the runway, i was stunted by its simplicity and the geometrical structure. So, today, I've decided to do a DIY by using a sewing machine. This is my first DIY using a sewing machine. Thank God my friend, Soo Ling was there to guide and teach me. The whole making process was fun because of my excitement with the machine feet paddle, I've also broke 2 needles that day so I'll let you decide whether my DIY was a success or a fail. 

Here is the actual Celine Berlingot from the official website.: 

 My version of the Berlingot : 


This sewing machine is just so vintage and beautiful, I can't help but to snap a few pictures.


Lets start now shall we ? The things you'll need are : 

-Thin fabric of your choice for the lining ( optional )
-Felt / leather
-9'' Zipper
-Pins to secure
-Leather strip for handle ( optional ) 
-Sewing machine / needle & thread 


STEP 1 : Measure and cut out 13'' x 18'' of felt. 


STEP 2 : Pin on the lining fabric and trim off any excess fabric, leave an inch from the felt.


STEP 3 : Fold rectangle in half and sew along the long sides together. When sewing fold in the lining to match the actual size of the felt so that it has a complete finish look to it. 


STEP 4 : Sew the bottom together with the seam in the middle. 

STEP 5 : Pin and sew the zipper to the right side of felt (This part is a little tricky).


STEP 6 : Fold it inside out and you're done.

The finished product : 


Special thanks to this wonderful friend of mine - SOO LING for helping me out and also teaching me how to use the sewing machine. She'll be leaving to Australia soon, so Lingo, I wish you all the best in your studies, please take good care of yourself. God bless you.You will be missed. 

 TANG SOO LING with her adorable smile

Photo by : Soo Ling
Phto courtesy of Celine, No copyright intended